Materials
One 12.5" (unfinished quilt block)
Background Fabric:
12.5" x 2.5"
12.5" x 5.5"
19.5" x 3.5"
19.5" x 9.5"
Cotton Batting: 20.5" x 25.5"
Backing Fabric: 21.5" x 26.5"
Binding: 3 strips cut selvedge to selvedge (I cut mine 2.5" wide but next time I'll cut my usual 2.75")
For Tabs: cut two 3.5" x 5.5"
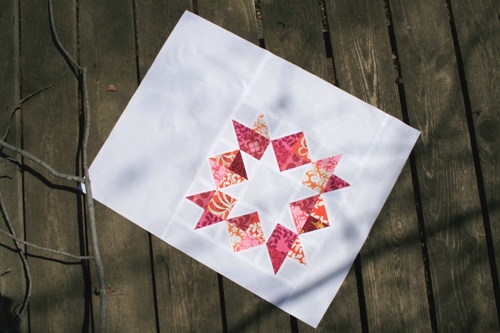
Step 1: Assemble the top.
Sew the 12.5" x 2.5" fabric strip to one side of block. Sew the 12.5" x 5.5" strip to the opposite side.
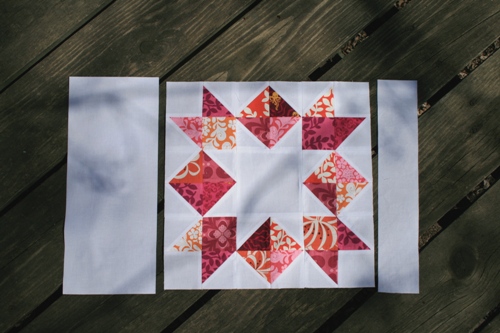
Press open. Sew the two 19.5" pieces to opposite sides of the block.
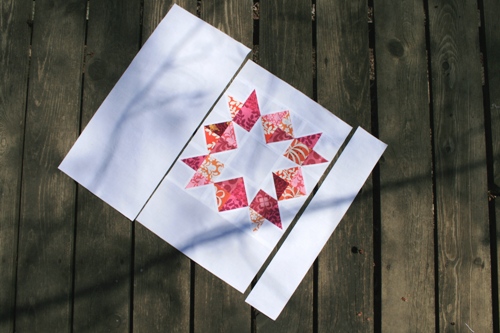
Press and trim to 19.5" x 24.5"
Step 2: Layer backing fabric, batting and top, pin and quilt as desired.
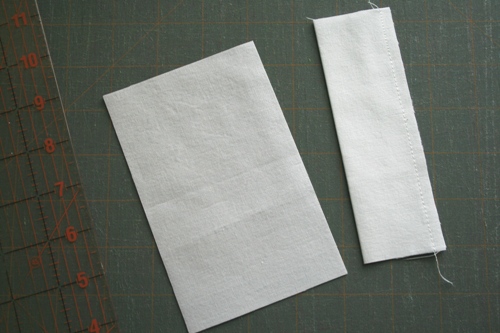
Step 3: Now we'll assemble the tabs.
Fold your tab fabric so the long edges meet. Sew a 1/4" seam.
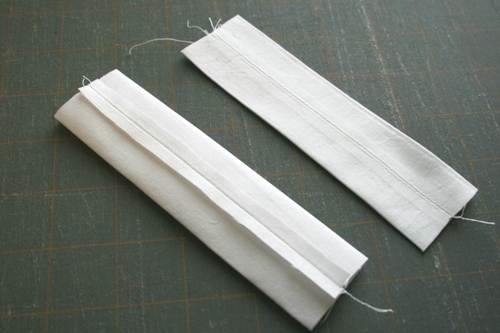
Press the seam open and then turn tube inside out. Press flat with the seam centered.
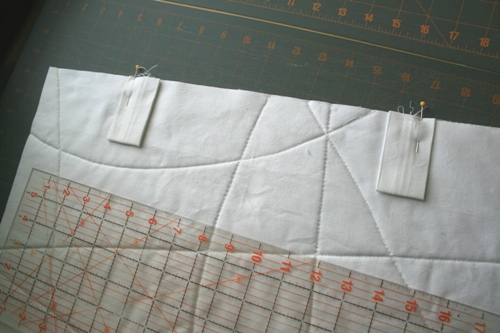
Decide which edge will be the top of your quilt. Fold the tab in half (with the seam on the inside) and pin so that the unfinished edges line up with the edge of the quilt
Step 4: Bind your quilt. When you turn it over, you'll see that the tabs are now sewn to the quilt.
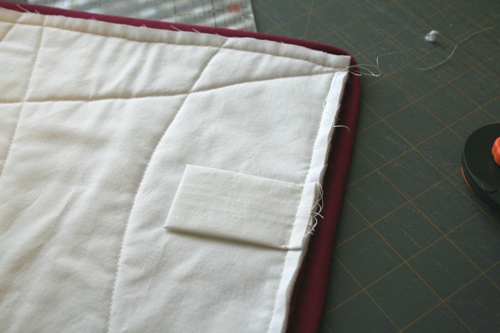
Hand stitch (or machine stitch) the binding to the back. When you get to the tabs, sew through the tabs and into the quilt if you can.
To finish the tabs, place a dowel under both layers of the tabs and mark where the edge should go.
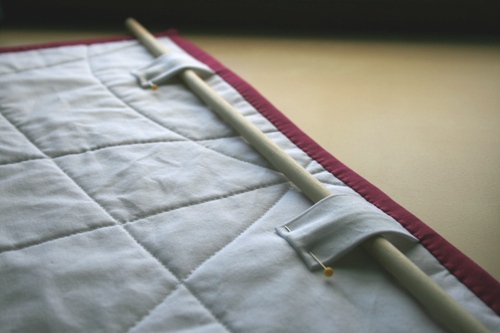
Whip stitch the edge in place.

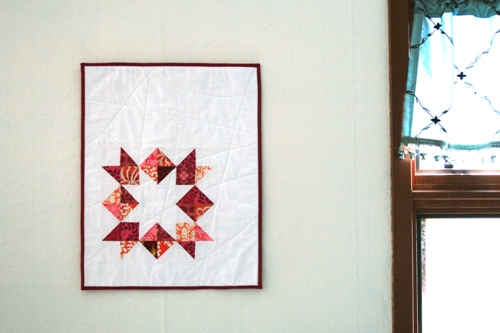
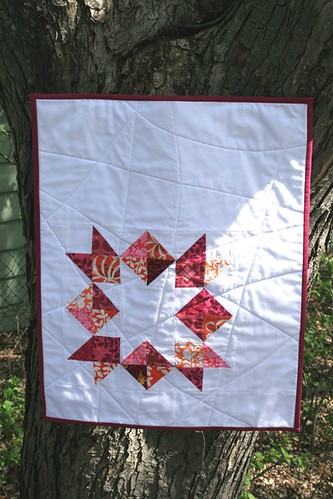
Insert the dowel again and it's ready to hang anywhere.
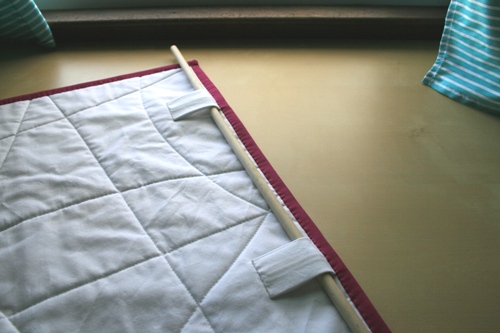
If your quilt is larger, place more tabs along the top edge to keep everything looking crisp and neat.