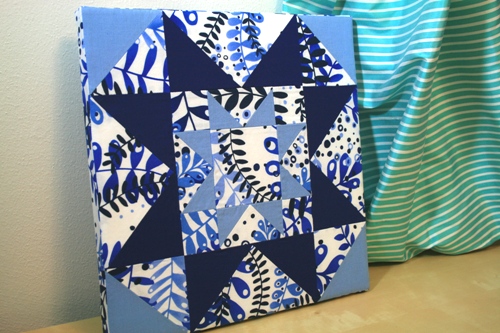
Hopefully you do because this week's project will show you how to turn those blocks into art.
Materials:
1 – 12.5”x12.5” (unfinished) quilt block (we used the Eight Hands Around block)
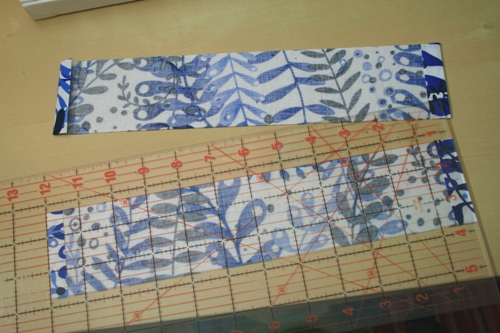
4 - 2.5"x13" strips of quilting fabric
1 – 12"x12” piece of cotton quilt batting
1 – 12"x12" canvas, 3/4" deep (a super cheap canvas is fine...mine cost $5)(Also, if your canvas is deeper, you will need to compensate by making your strips wider than 2.5")
Staple gun

Step 1: First we need to prepare our fabric strips. Place your four fabric strips wrong side up and fold the short ends over 1/2" (press with your iron). Make sure your strips measure 12"x2.5" when you're done. These will wrap around the sides of the canvas so it's important to be exact.
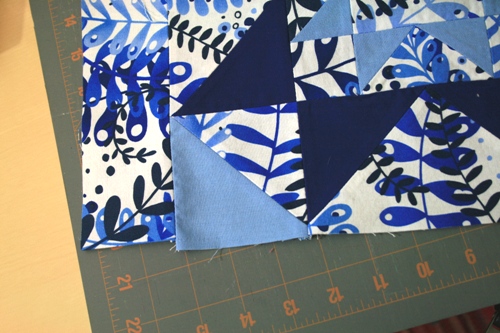
Step 2: Now we'll sew the strips to the block. Place one strip along the edge of your block, right sides together. Make sure the strip is centered along the edge...the strip should be 1/4" shorter than the block on both sides.
Sew a 1/4" seam and make sure to press your seam open:
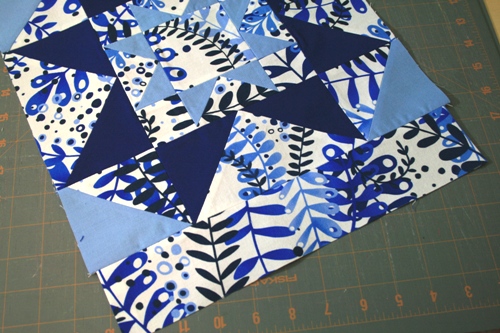
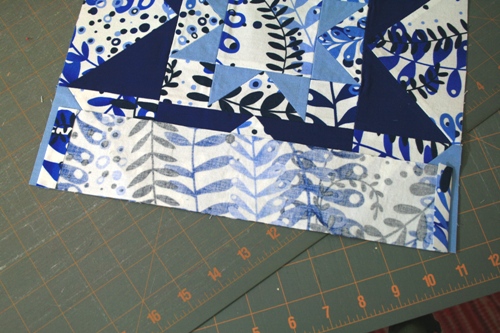
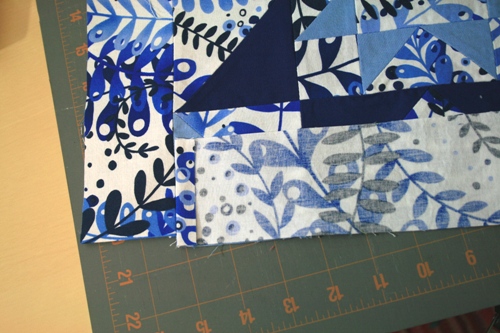
Repeat with all four strips. I prefer to sew them in opposite pairs so your second strip should go along the edge opposite the first. When you get to your third and fourth strip, you'll notice that your block is now 12" and your strip lines up exactly along the edge:
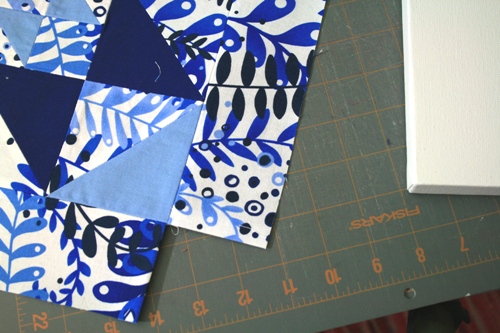
After you press your third and fourth strips open, you should have a nice corner that has nice finished edges:
Step 3: Now we'll cover our canvas. Iron your block again to make sure your seams are really, really flat. Then, turn your block over and place your batting so it lines up with the edges of the block:
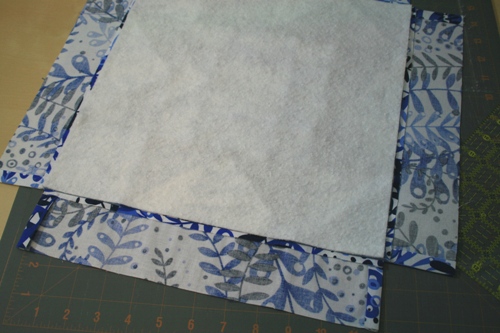
Place your canvas so it lines up with the edges of your batting/block:
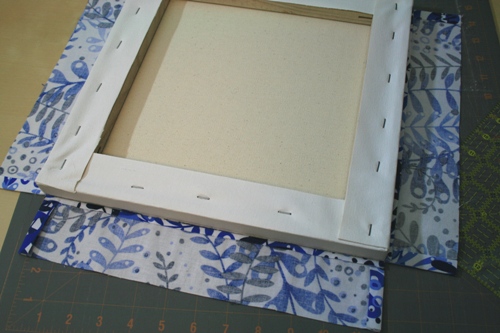
Fold the sides of your block up and staple once on each side. It's important to keep your fabric tight without stretching it too much...you want the front to be taught but you don't want to warp the block.
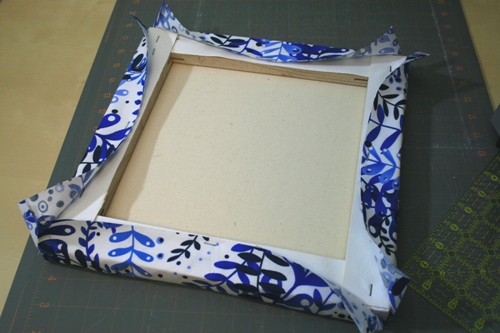
Carefully turn your canvas over to make sure everything looks good. If it doesn't, take the staples out and re-center your canvas. If everything is fine, staple opposite sides of the canvas, keeping your fabric taught as you go, until you reach the corners. I like to tuck the end in a little to reduce bulk:
Repeat with the remaining two sides of the canvas, turning over the corner as you reach the end:
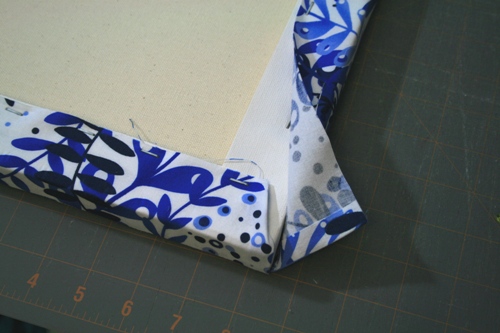
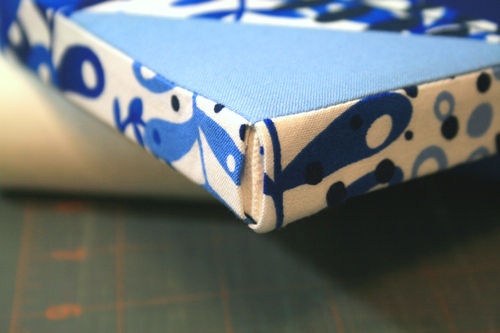
If you've done everything right, you will have a tiny gap at the corners:
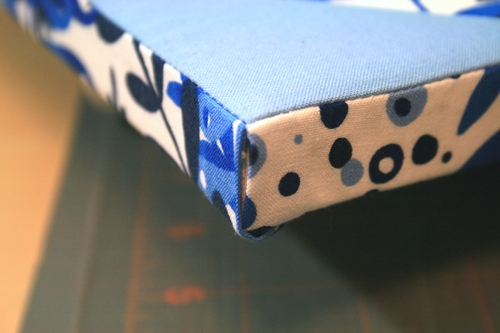
or a larger gap because no one's perfect:
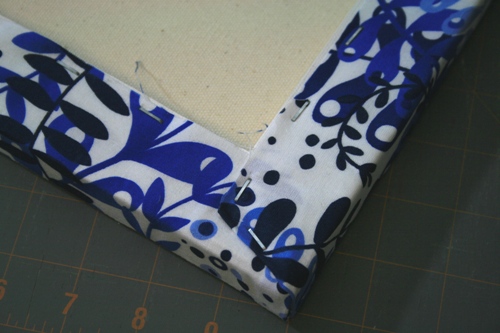
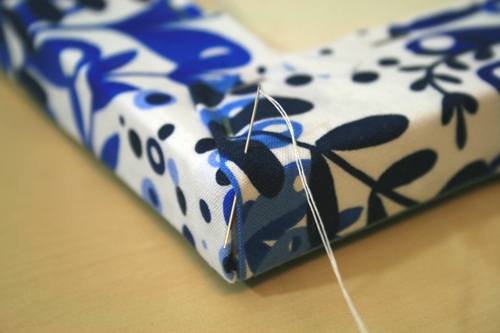
I like to sew up the corners but that's optional. Here's a great video that shows how to do a ladder stitch...it makes invisible stitches!
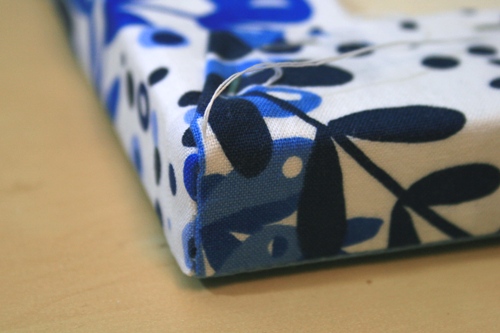
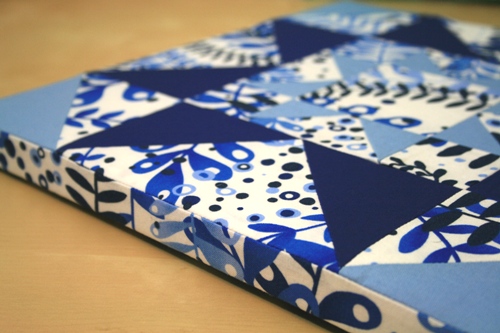
Once you're done sewing, turn over your canvas and enjoy your custom work of art!
As always, feel free to ask questions. Also, look for the giveaway post on Thursday!